안녕하세요! 오늘은 OpenWeatherMap API를 사용하여 현재 날씨 정보를 불러오는 방법에 대해 알아보겠습니다.
JavaScript를 사용하여 날씨 정보를 가져오는 간단한 웹 페이지를 만드는 방법을 단계별로 설명하겠습니다.
1. OpenWeatherMap API 가입하기
Current weather and forecast - OpenWeatherMap
OpenWeather Weather forecasts, nowcasts and history in a fast and elegant way
openweathermap.org
이 날씨 API는 일정 부분부터는 유료로 제공하는 API이니 참고하시길 바랍니다.
먼저, OpenWeatherMap API를 사용하기 위해 계정을 만들어야 합니다.
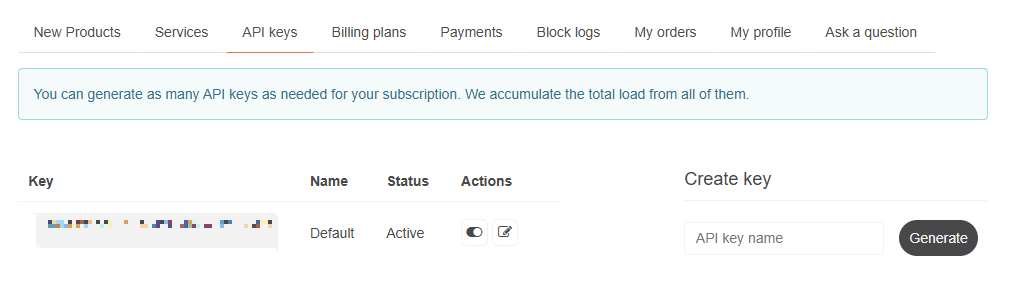
로그인 후 API Keys로 들어가 Key를 발급받아줍니다.
2. 기본적인 HTML 구조
<!DOCTYPE html>
<html lang="ko">
<head>
    <meta charset="UTF-8">
    <meta name="viewport" content="width=device-width, initial-scale=1.0">
    <title>현재 위치와 날씨</title>
    <style>
        /* 간단한 스타일 추가 */
        body {
            font-family: Arial, sans-serif;
            background-color: #f0f8ff;
            color: #333;
            margin: 0;
            padding: 20px;
        }
        h1 {
            text-align: center;
            color: #007BFF;
        }
        #location {
            font-size: 1.5em;
            margin: 20px 0;
            text-align: center;
        }
        #weather {
            font-size: 1.2em;
            text-align: center;
            padding: 10px;
            border: 2px solid #007BFF;
            border-radius: 5px;
            background-color: #ffffff;
            box-shadow: 0 2px 10px rgba(0, 0, 0, 0.1);
        }
    </style>
</head>
<body>
    <h1>현재 위치와 날씨 정보</h1>
    <div id="location"></div>
    <div id="weather"></div>

    <script>
        // JavaScript 코드가 여기에 들어갑니다.
    </script>
</body>
</html>
3. JavaScript로 Api 불러오기
// 사용자 위치 가져오기
if (navigator.geolocation) {
    navigator.geolocation.getCurrentPosition(success, error);
} else {
    console.log("이 브라우저에서는 Geolocation이 지원되지 않습니다.");
}

function success(position) {
    const latitude = position.coords.latitude;
    const longitude = position.coords.longitude;

    // 위치 정보를 도시 이름으로 변환
    const geocodingUrl = `https://nominatim.openstreetmap.org/reverse?lat=${latitude}&lon=${longitude}&format=json&addressdetails=1&accept-language=ko`;

    fetch(geocodingUrl)
        .then(response => response.json())
        .then(data => {
            const city = data.address.city || data.address.town || '도시 정보를 찾을 수 없습니다.';
            document.getElementById('location').innerText = `현재 위치: ${city}`;
            getWeather(latitude, longitude);
        })
        .catch(err => {
            console.error('위치 정보를 가져오는 데 오류가 발생했습니다:', err);
        });
}

function error() {
    console.log('위치를 가져오는 데 실패했습니다.');
}

function getWeather(latitude, longitude) {
    const apiKey = 'your_api_key';  // 발급받은 API 키
    const weatherUrl = `https://api.openweathermap.org/data/2.5/weather?lat=${latitude}&lon=${longitude}&appid=${apiKey}&units=metric`;

    fetch(weatherUrl)
        .then(response => response.json())
        .then(data => {
            const temp = data.main.temp;
            const description = data.weather[0].description;
            document.getElementById('weather').innerText = `현재 온도: ${temp}°C, 날씨: ${description}`;
        })
        .catch(err => {
            console.error('날씨 정보를 가져오는 데 오류가 발생했습니다:', err);
        });
}
4. API 키 설정
위 코드에서 your_api_key 부분에 OpenWeatherMap에서 발급받은 API 키를 입력해주시면 됩니다.
5. 웹 페이지 테스트

이제 index.html 파일을 웹 브라우저에서 열어보시면 잘 불러와진 것을 볼 수 있습니다!
api의 변수명을 잘 확인하시고 불러오시면 됩니다!
반응형
'JAVA > Coding' 카테고리의 다른 글
| [JAVA] ArrayList 말고 배열에 데이터 추가하는 방법 <3 (0) | 2024.05.31 |
|---|---|
| [JAVA] 자바FX로 로그인, 회원가입 창 만들기 + mysql(자세한 설명) (32) | 2023.09.12 |
| [JAVA] AWT로 창띄우고 버튼과 메모지 만들기 - member, anonymous inner class사용 (0) | 2023.09.05 |
| [JAVA] 자바 소켓(Socket)통신 이란? 코드 구현 (0) | 2023.09.01 |
| [JAVA] TCP/IP란? 자바로 구현해보기 (0) | 2023.08.13 |


